Excursion train #6 with a full load of passengers takes it's first trip all the way around the layout. The train departs the rural depot, makes it's way thru the rail yards and out on to the main line inner loop. After making it's way around, it passes through the crossover onto the outer loop. After completing the outer loop, it crosses back to the inner loop and then backs into the station. A very successful trip.
Where the side tables join the center "coffin" the track has to be split so that the side table can be tilted up for storage. So when I was finishing the outer track, I just laid a solid piece of track across the split point, nailed and glued it down so it wouldn't shift later.
Then I cut the rails with my battery Dremel tool.
Now when I raise up the side table the track neatly separates and will line back up when the table is lowered.
So I finished up late last night. My Dremel tool battery was dead, so I put it on the charger. My poor car has set out all night for the last few nights so I decided to fold up the train table, move it out of the way and park the car in the garage.
(Remember, I said my Dremel tool was dead!!) This is what I discovered this morning!!!!!
The curve is a little tight for most of my trains.
Thursday, June 24, 2021
IT'S BEEN ALMOST A YEAR SINCE MY LAST UPDATE.
I have been very busy with my train club. Even with COVID our board of directors has been meeting regularly planning for the future. We have had to find a new place to hold our meetings as the church where we used to meet is no longer allowing out side groups. And we are going ahead with plans to host our annual Beat The Heat train show. I have also been helping other club members with their layouts, mostly electrical problems (of course). I formed a new club committee to help spouses of deceased club members to dispose/remove/sell the husband's trains and layout. We have help four families this year. I have even bought a couple of estates and sold most of it on ebay.
NOW FOR A SHORT TOUR OF MY LAYOUT
Entering into the "yard". The yard master's office in the distance. A workman is bringing a wheelbarrow load of coal for the stove.
Round house
Small rural passenger station. A railfan excursion train leaves from here. Also, the Doodlebug commuter train will depart here.
Passengers waiting to board a train.
A group of workman are digging a new water line.
SOME NEW VIEWS FROM AROUND THE YARD AREA
These trees are all natural. They are made from dormant flower clusters I cut off of a bush in the Kohl's parking lot while waiting for Gayle one day.
Drawing lines where the track will go.
Starting to lay roadbed for the track. All the little dots on the roadbed are pushpins holding it down while the glue dries.
This piece of scenery is from an estate layout that I bought. I was able to salvage it off of the old layout and just lay it on mine. It is a complete farm scene with animals, garden, corn rows, a hay field and I have the house and barn that went with it. I will have to blend it into the rest of whatever scenery I put on this wing of the table.
All my steam engines need coal. So the railroad company built one. It was a kit I purchased a few years ago on ebay. It turns out it was manufactured in the 1950s. Back then there were no plastic building kits. They were all wood, cardboard and lead metal pieces. When I opened this kit, it was a bundle of "sticks", a few metal parts and a nicely detailed instruction sheet.
I had started construction here. The box things are parts of the building made from VERY thin sheet wood.
A better view of the main parts of the tower.
Lots of sticks, all hand glued into position.
Most were precut the to correct length, I just had to figure out which piece went where.
Ready to paint
The stairs were cast lead. Just had to glue in place. BUT the hand rails all had to be cut and carefully glued in place.
All painted and ready for finishing details.
The kit included 2 small brass lamp shades. They were designed to be dummies glued to the end of a piece of wire then glued in place. You can see how small compared to a penny.
But it's modern times now. So I got some micro LED lights and modified them to actually work.
That little yellow square thing is the LED.
Looks almost real!!
This little shed sits behind the tower and is the "lift" motor and mechanism that lifts the coal to the top of the tower and then it gravity feeds into the coal car when needed.
I am concentrating on the center section with the "yards" because once I put the wings back on, I won't be able to reach the middle. I don't want to remove a wing just to plant a new tree or small building.
"THREE LITTLE PUFFER BELLIES ALL IN A ROW!"
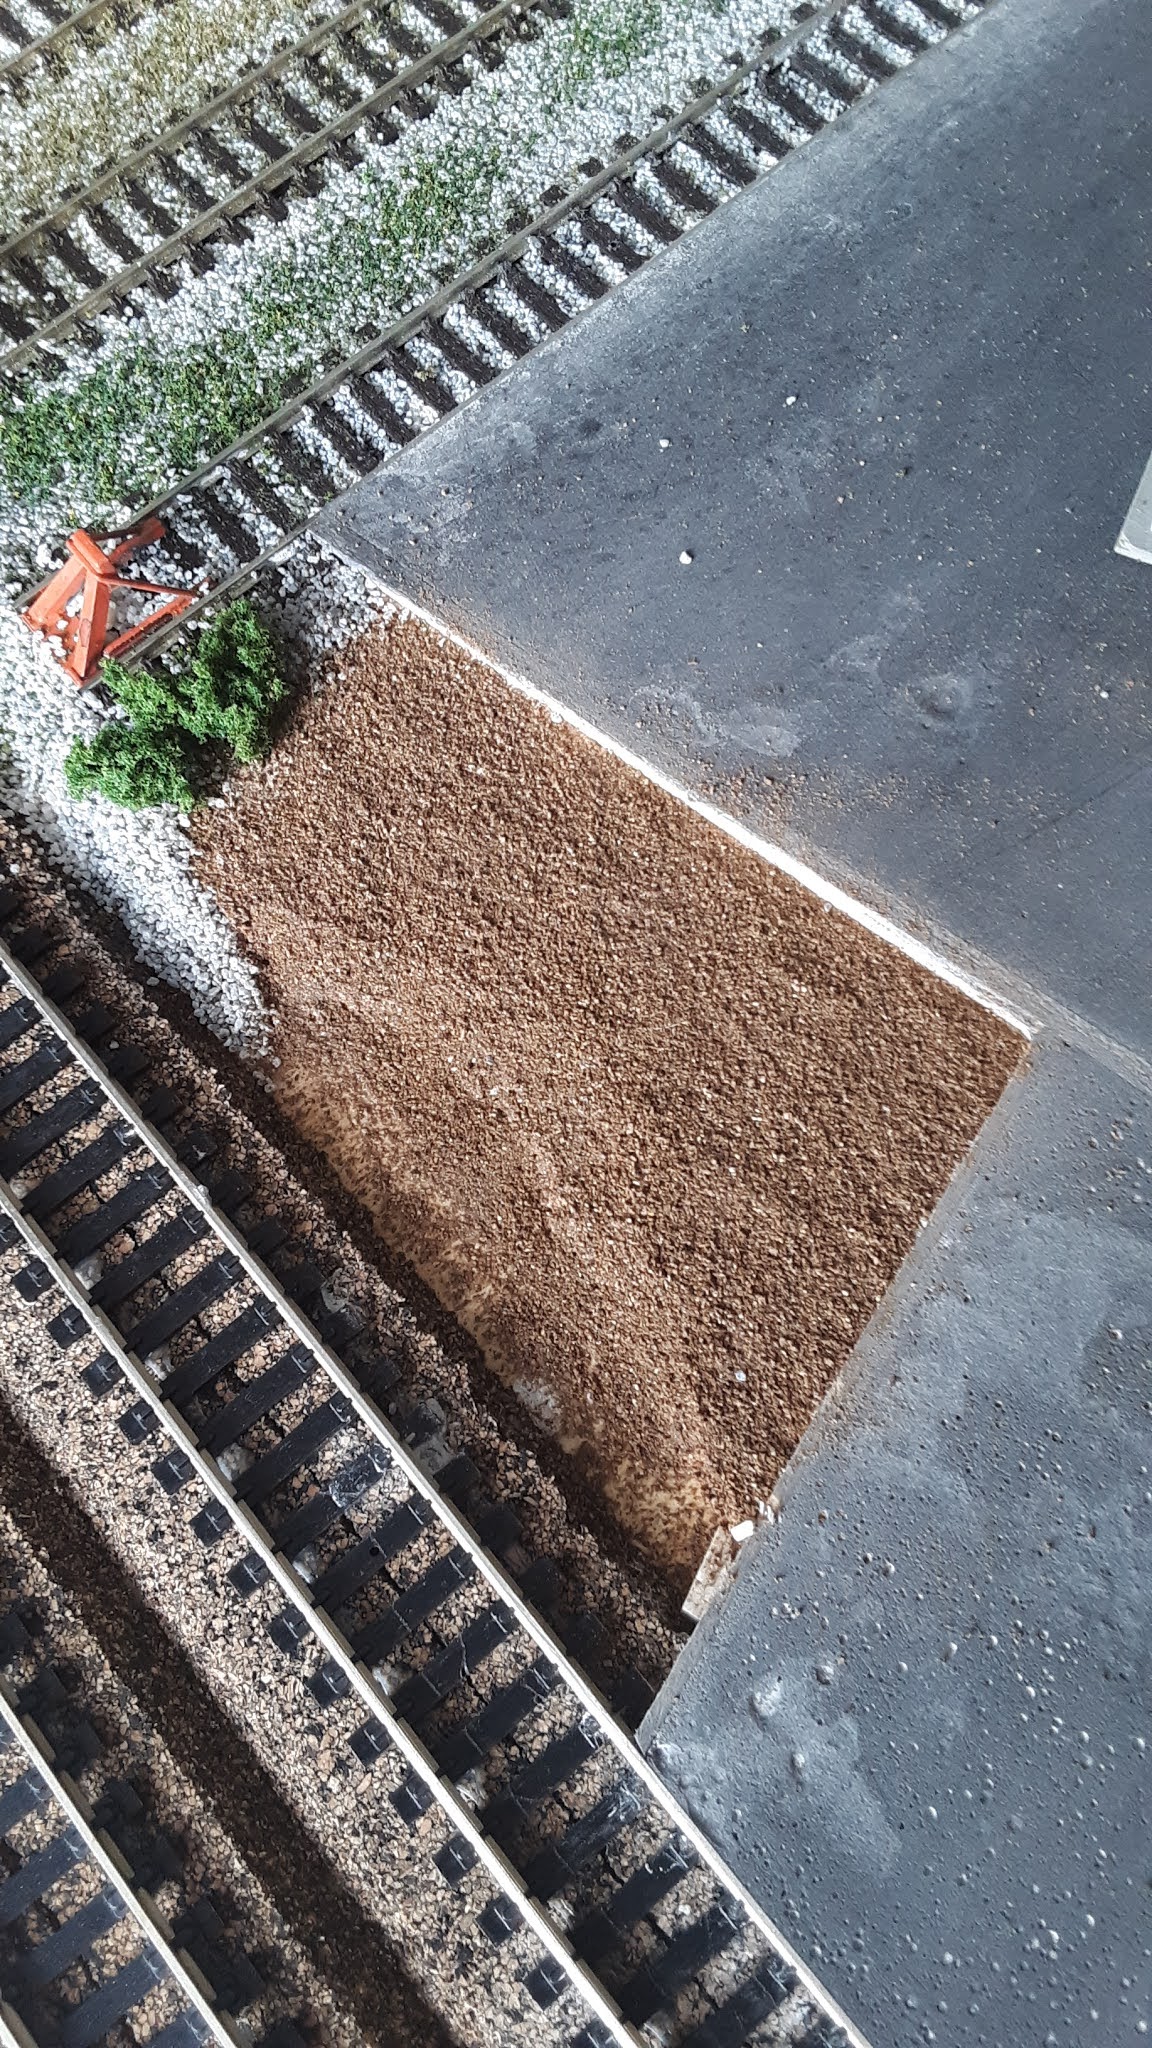
Old train storage yards didn't have a lot of traffic so grass, weeds and bushes tend to grow there.
Here I have added more track ballast (the gravel between the rails). You glue it in place by carefully pouring the ballast along the tracks, then mist it with "wet water" (water with added dish soap), this makes the glue wick into all the cracks and then carefully "dribble" on diluted white glue.
Not all materials are man-made. The brown "dirt" is from my yard. Just sifted with one of Gayle's good kitchen sifters (don't tell her).
This is the initial concept for a track layout plan. Town is on the left, train storage yard in the middle and countryside and a small mountain on the right. Nothing elaborate. The train storage yard is all on the base unit. That way I can park all the trains at the end of the day, then fold up the table and put it away. Now I don't have to pick up all the engines and cars and put them in boxes. I just leave them in the yard ready to go for the next time.
BUILDING THE TABLE.
Building the base unit. It is 8 feet long and about 3 feet square.
Adding casters to make it easy to move. You'll see why below. The hole in the end is where the control panel will attach.
Completed base unit. This side is open for storage. Some day I'll put doors on to keep dirt out of the storage area. For now I will keep boxes of items that will be installed on the layout (buildings, track, electrical stuff, scenery, etc). Later, I'll store extra trains here.
Building the 4X8 foot "wings". The first one is in the background.
Moved the project out of the shop as there wasn't room to assemble the whole table inside. The "wings" are attached to the base unit with 4 door hinges.
The completed table is 11 feet wide and 8 feet deep. Takes up a lot of space in my garage.
Here's the slick part. It FOLDS. That's why I attached the "wings" with door hinges.
The support legs are used to keep the wings in the upright position for storage.
When I'm done "playing" the whole thing rolls to the side of the garage with plenty of room to park the car.
When it comes time to add buildings and scenery, it's a long reach across 4 feet of table. So, by adding 4 legs to a "wing" it becomes a free standing table.
After attaching the legs, I lower it back down to the normal position. Then I pull out the hinge pins that hold the wing to the base unit.
Now I can work all the way around the table.
I have started working on the center section first. I removed both "wings" so I can get to every part of the base section. I glued down a layer of sheet cork first. This is the track road bed that supports the track and it acts as a sound barrier. If I put the track right on the plywood, it would act like a drum head and amplify the sound of the trains rolling on the track. Even though the trains are small, they make a lot of wheel noise as they roll on the track (just like the real trains). Here is the first sections of track. You'll see how these fit in the scheme of things as this project progresses.
This is all the tracks in the "yard".. The tracks on the left are for freight cars and the 2 on the right is where my long passenger train will park. The triangle with 3 tracks is the foundation for the engine house where engines are stored and serviced at night for the next day's work.
The freight cars, ready to roll.
SOUTHERN PACIFIC DAYLIGHT train ready.
The underside of the yards. Lots of wires running everywhere. The green boxes are small motors that move the switch tracks that guide the trains into the different tracks. These are all controlled from the main control panel.
All those wires connect into the back of the control panel.
This is the control panel. It has the speed controls (throttles), controls for all the electrically operated switch tracks and switches for all the lighting and signals. You'll note my railroad name is "Mesa Lines". Mesa is Spanish for table. This is the name my father used for his model trains more than 60 years ago.
Lets just say, I know what all those switches, knobs and lights are for.
The completed engine house.
Just outside the engine house is the water tower. All steam engines need lots of water.
CLICK HERE TO SEE MY YOUTUBE VIDEO OF THE FIRST TRAIN TO RUN.